Your attention to detail should give you much better balanced tops than I was ever able to achieve.
Don't sell yourself short Don. The tops you made and the balance you achieved were at the limit of success for this technique. My success ratio will not be better than yours. Without complicated features for heat control at various places on the mold as Kirk suggested, the tumbling action of the material inside the mold provides only an approximately uniform distribution of material around the mold. In reality there is no control over how the material contacts and bonds to other material during the melt cycle. Vast differences in wall thickness are likely which in addition to providing unbalanced weight distribution, causes non-uniform shrinkage which can distort the shape and contribute to a poorly spinning top.
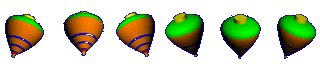
As Poptop and Neff suggest, these tops are begging to have the crowns opened up (the diet mod). The novelty of the sealed hollow top is nice so any that are coincidentally balanced will not be opened, but those with poor balance will get the cap turned opened to allow the installation of balancing putty or perhaps even the removal of obviously misplaced plastic.
My attention to detail is most likely unnecessary and over kill. Think about having a mile of highway to pick up litter and working with a toothbrush to clean up one foot.

On Wednesday the molder displayed an issue with one of the chains that drives the rotation mechanism. I took that as a sign to move on to the tips for a while. I made a prototype tip from steel to check the play and decided that steel was the right choice. The step at the joint between the top body and the tip will be filed flush with the tip before everything is complete.

To continue with the description of the construction, my approach to making a batch of tips for these top followed the sequence in these pictures of the tip evolution and the basic set up on the lathe. For making one tip at a time I would machine the whole tip in one mounting on the lathe and machine it out of the bar of stock. For a lot of them it is faster to cut a bunch of blanks from the stock, set up for each profile, and perform that profile cut on each blank before proceeding to the next profile. My first set up was to machine the hub that fits into the top body and drill and tap a hole to accept a threaded stud. Next was to cut the first sloped surface which will match the body angle of the top. Third was to cut the second angle which defines the other side of the diabolo style neck. Last was to machine the point. The point was actually machined to a sharp which was filled to a round such that is felt good spinning in the hand.


 Author
Topic: Educational size rotational molding machine (Read 64058 times)
Author
Topic: Educational size rotational molding machine (Read 64058 times)