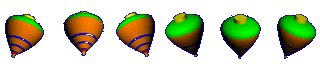
I balanced the top with trial and error so it was by no means perfect.
Hi, James. In which way did you balance the top ? By shifts of the contact point, (maybe filing the sides of the tip, as I do), or adding some weight to the top ?
Iacopo I have alsways admired the fine and near perfect looking knurling you achieve on the wood of your tops. How do you do this? Do you use the technique with the lathe that you also use on the aluminium knurls? Or with files? Any tips?
Yes, I use always the same technique, whatever the material of the stem.
For doing this, I use the lathe in an unconventional way;
I remove temporarely the feed screw from the tool post slide, so that the tool post slide is free and I can move it back and forth more quickly, (moving it by the handwheel would take too much time).
I made a knife specifically for cutting the grooves in my stems, I mount it in the tool post as shown in the photo, then, moving the tool post slide back and forth, I cut the grooves, one by one.

I don't keep the way of the tool post slide exactly at 0 degrees but I tilt it a bit, to the same angle of the taper of the stem, plus 0.5 degrees. If, for example, the taper angle of the stem is 2.5 degrees, I set the way of the tool post slide at 3.0 degrees;
in fact you can see that the grooves are deeper at the right, while at the left they fade away.
For to have a regular spacing between the grooves, I use a little trick, I insert a stick in the gearbox, between the gearbox and one tooth of the main gear of the spindle axis. This marks a fixed position for the chuck. That gear has 24 teeth, so, in this way, I have 24 fixed positions of the chuck with a regular spacing between each position and the next one. (This is explained poorly, if it is not clear enough, tell me and I will add an explanatory sketch).
This also allows me to cut the grooves two times, with my wooden stems;
the first time I cut the grooves in the wood.
Then I cover the wood with a thick layer of epoxy resin, the resin fills the grooves in the wood.
Then I cut the grooves for a second time, removing the excess of resin from the grooves.
The stick in the gearbox allows me to cut the second grooves exactly superposed to the first grooves in the wood.
In the picture above, the shaving is white because what was being removed was resin, not wood.
As I already said in the past, this is labor intensive, but the finish quality is very good:


 Author
Topic: Spinning Top Nr. 11 (28 minutes) (Read 3599 times)
Author
Topic: Spinning Top Nr. 11 (28 minutes) (Read 3599 times)